
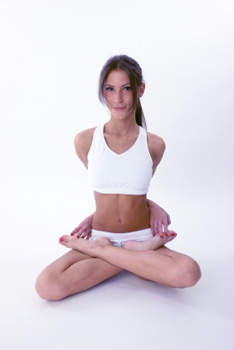
How to Do Bound Lotus Pose in Yoga
The Sanskrit name for this pose, "Baddha Padmasana" (BAHD-uh pahd-MAHS-uh-nuh), comes from three words:
- "Baddha" — meaning "bound," "restrained," or "caught"
- "Padma" — meaning "lotus"
- "Asana" — meaning "pose"
This pose is recommended only for students who can already sit comfortably in Lotus Pose for several minutes. If you cannot yet perform Lotus Pose, practice Half Lotus Pose (Ardha Padmasana) until you have gained the strength and flexibility needed for Lotus Pose.
Benefits of Bound Lotus Pose
Bound Lotus Pose offers a deep opening to the chest, back, and shoulders. It also provides all of the benefits of Lotus Pose, including:
- Stretched knees, ankles, and hips
- A strengthened spine and upper back
- Improved circulation in the spine and pelvis
- Relief from menstrual discomfort in women
- Toned abdominal organs
Lotus Pose and all of its variations help calm the mind and prepare the yoga student for deep relaxation and meditation. This pose is called the "destroyer of all diseases," and is believed to awaken the divine cosmic force called "Kundalini," which brings forth enlightenment through self-realization.
The yogi who, seated in Padmasana, inhales through the entrances of the nadis and fills them with maruta or vital air gains liberation; there is no doubt about it.
14th century, BCE
Cautions
Avoid practicing this pose if you have a recent or chronic injury to the knees, ankles, or hips. Bound Lotus Pose requires a great deal of flexibility and self-awareness to be performed correctly. It is very easy to injure yourself if you try to move into it too soon. Do not attempt to learn this pose on your own without the guidance of an experienced and knowledgeable instructor. Always work within your own range of limits and abilities. If you have any medical concerns, talk with your doctor before practicing yoga.
Instructions
- Sit on the floor with your legs extended, spine straight, and arms resting at your sides. This is Seated Staff Pose (Dandasana).
- Bend your right knee and hug it to your chest. Then bring your right ankle to the crease of your left hip so the sole of your right foot faces the sky. The top of your foot should rest on your hip crease.
- Bend your left knee. Cross your left ankle over the top of your right shin. The sole of your left foot should also face upwards, and the top of your foot and ankle should rest on your hip crease.
- Bring your knees as close together as possible. Press your groins toward the floor and sit up straight.
- Reach your left arm behind your back and clasp your left foot's big toe with your left fingers. Then, reach your right arm behind and clasp your right foot's big toe. Those with more flexibility can hold onto the top of each foot.
- Soften your face and bring your gaze to your "third eye," the space between your eyebrows.
- Hold for up to one minute, or for the duration of your meditation or pranayama practice.
- Release the pose by very slowly and gently extending both legs along the floor in Staff Pose. Repeat the pose for the same amount of time with the opposite leg on top. Then release the pose and rest in Corpse Pose (Savasana) for at least five minutes.
Modifications & Variations
Bound Lotus Pose offers a deep stretch to your shoulders, chest, and low back. Be careful never to force the bind, and make whatever modifications you need to feel safe and supported in the pose. Here are a few suggestions:
- If you are not yet able to perform Lotus Pose, do not practice this variation. Instead, practice Half Lotus (Ardha Padmasana) until you have gained the flexibility and strength to sit comfortably in that pose. If Half Lotus is difficult, start with Easy Pose (Sukhasana).
- If you can't yet hold onto both feet, hold onto only one until you become more limber.
- If you can't yet reach either toe, work on reaching your shoulders back and drawing your shoulder blades close together. Then cross your arms behind you. Rest the back of each hand on the opposite hip. With time and practice, you can gain the flexibility required to clasp your toes.
- For a greater challenge and the fullest version of the pose, fold forward while in Bound Lotus. Touch your chin to the floor in front of you, and also touch your chin to each knee. This variation is called "Yoga Mudrasana."
Tips
Practicing Bound Lotus Pose can deeply stretch your body while preparing your mind and spirit for deep relaxation and meditation. Keep the following information in mind when practicing this pose:
- Since Lotus Pose (Padmasana) is the foundation for Bound Lotus, it's important to get its alignment correct. Thoroughly review the information in the iSport guide, How to Do Lotus Pose in Yoga, before trying this variation!
- Make sure you change the cross of your legs and the cross of your arms. Practice the pose for the same amount of time on both sides.
- After you have practiced Bound Lotus Pose, take some time to sit or lie quietly. Acknowledge your practice and the efforts you have made.
Become Bound to Your Practice
Practicing Bound Lotus Pose can connect you with the ancient practice of yoga, as it is a pose that has been performed by yogis for hundreds, even thousands, of years. When you sit in Bound Lotus, your mind naturally calms down, creating space for silence and peace. Achieving this pose may take patience and dedication, but remember there is no rush. Be gentle with yourself, take it slowly, and you will gain every benefit this ancient pose has to offer.


