
Yoga for Neck Pain
In the digital age, neck pain has become increasingly prevalent due to our prolonged engagement with computers, smartphones, and other electronic devices. Known colloquially as "tech neck," this condition is characterized by discomfort caused by poor posture and the repetitive stress of looking down at screens. Let’s explore how yoga offers a reprieve by providing stretches and strengthening exercises that can alleviate neck strain and serve as a counterbalance to our tech-centered routines with Everyday Yoga.
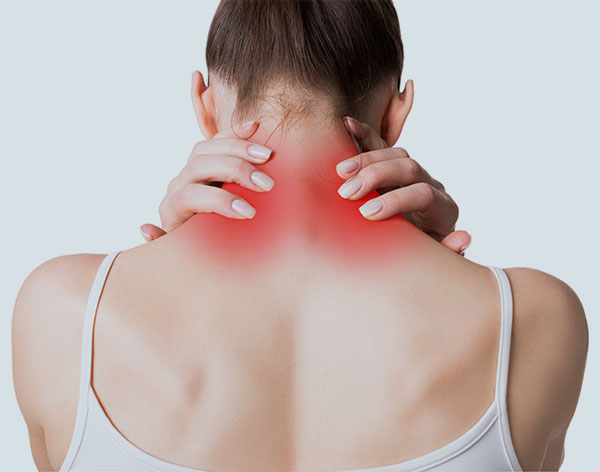
What is Neck Pain?
The nature of contemporary work and leisure often leads to slumped shoulders and a forward-jutting head, a far cry from the natural alignment our bodies require. As a result, the sensitive muscles and vertebrae in the neck become susceptible to strain and stiffness. Chronic neck pain can not only affect range of motion but can also lead to tension headaches and overall discomfort.
Yoga as a Remedy for Neck Pain
In our modern society, yoga's holistic approach addresses neck pain at its root by emphasizing proper alignment, strength, and flexibility. Specific poses can relieve existing pain while preventive practices can help maintain neck health. Moreover, yoga's focus on mindful movement increases body awareness, allowing us to recognize and correct postural habits that contribute to neck discomfort.
Effective Yoga Poses for Neck Pain Relief
- Neck Rolls - Rotate the neck slowly and with control to release tension in the cervical spine.

- Sit or stand in a comfortable position with your spine straight and your shoulders relaxed. If seated, your feet should be flat on the floor.
- Begin with your head upright, looking straight ahead, and your chin parallel to the floor.
- Take a deep breath in, and as you exhale, slowly lower your chin toward your chest, feeling a stretch along the back of your neck.
- Inhale, and gently roll your head to the right, bringing your right ear toward your right shoulder without lifting the shoulder. Only roll as far as comfortable.
- Exhale and slowly roll your head backward, allowing your head to tilt back gently and looking up at the ceiling without straining.
- Inhale and continue the roll to the left, bringing your left ear toward your left shoulder.
- Complete the circle by exhaling and bringing your chin back down toward your chest.
- Perform this rolling motion slowly for 3-5 full rotations, focusing on smooth, fluid movements.
- Once you've finished your rotations in one direction, repeat the same number of rotations in the opposite direction to maintain balance in the muscles.
- Return your head to the neutral starting position and take a few natural breaths, noticing any changes in tension around the neck and shoulders.
- Thread the Needle Pose (Parsva Balasana) - Gently stretches the shoulders and the back of the neck to alleviate tightness.

- Start in a tabletop position with your knees under your hips and your wrists under your shoulders.
- Extend your right arm out to the side and then thread it underneath your left arm, palm facing up, as you gently lower your right shoulder and cheek to the mat.
- Keep your left elbow lifted and hand pressed into the mat for support, or for a deeper stretch, walk your left hand forward to extend the arm fully.
- Your hips should remain high over your knees, and you can adjust the intensity of the stretch by modifying the placement of your left hand and the pressure on your right shoulder.
- Hold the pose for several deep breaths, focusing on relaxing into the twist and opening up your shoulders.
- To release, press into your left hand, unthread your right arm, and return to tabletop position. Pause for a moment, then switch sides.
- Cat-Cow Stretch - Promotes movement and flexibility in the cervical spine with a rhythmical motion.
:max_bytes(150000):strip_icc()/About-A3-CatCow-019-570d44f83df78c7d9e3c571e.jpg)
- Start on your hands and knees, with your wrists directly under your shoulders, and your knees directly under your hips. Point your fingertips to the top of your mat. Place your shins and knees hip-distance apart, center your head in a neutral position, and soften your gaze downward.
- Inhale as you drop your belly towards the mat, lift your chin and chest, and gaze up toward the ceiling. This is Cow Pose.
- As you exhale, draw your belly to your spine and round your back toward the ceiling. The pose should look like a cat stretching its back. Release the crown of your head toward the floor, but don't force your chin to your chest.
- Inhale, coming back into Cow Pose, then exhale as you return to Cat Pose.
- Repeat 5-20 times, then rest.
Yoga into our Daily Life for Neck Health
To fully benefit from yoga for neck pain, regular practice is vital, and even a few minutes daily can be impactful. Additionally, becoming aware of our posture during everyday activities and taking breaks to stretch and move can reinforce the gains made while practicing yoga.
HELPFUL TIP!
Even though yoga is useful, it is equally important to consider ergonomic principles at our workstations, to adjust the way we hold and look at our electronic devices, and to stay conscious of our posture throughout the day.
Conclusion
As you can see yoga's power to alleviate neck pain is rooted in its comprehensive approach to wellness. Through consistent practice, we can not only find immediate relief but also develop healthier habits that prevent neck strain from taking hold, despite the demands of modern life. Embrace yoga's restorative stretches and postures, and allow your neck to rediscover the freedom of movement it was always meant to have.
If you've found relief from neck pain through yoga, feel free to share your journey or any specific practices that have been particularly beneficial with Everyday Yoga. Let's foster a community that supports one another in overcoming the aches brought on by modern living.
See you on the mat!
Namaste!


